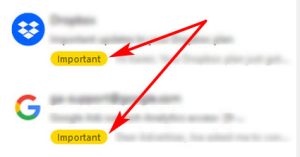
 Depending on the email client you use, you may see every and I do mean ev-er-y single email marked with a bright yellow IMPORTANT label. It’s maddening to keep unchecking them to only have the next email reappear as important. Again.
Here’s the only fix that works to stop Gmail from marking all emails as important.
If you don’t want emails getting marked as important, go to mail settings > inbox – disable Importance markers, and then set up a new filter.
Step 1: How to Disable Gmail “Important” Markers
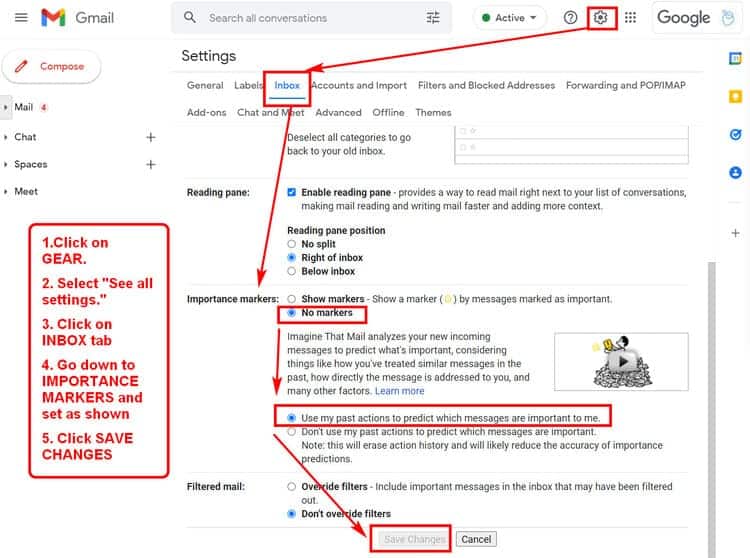
Sometimes this works and sometimes it doesn’t. If Gmail keeps marking incoming mail as important– even after you’ve manually unchecked it in your email client–move on to Step 2. It works like a charm.
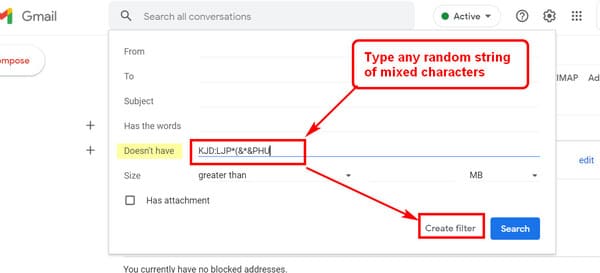
Step 2: How to Set Up a New Filter to Remove Important Markers
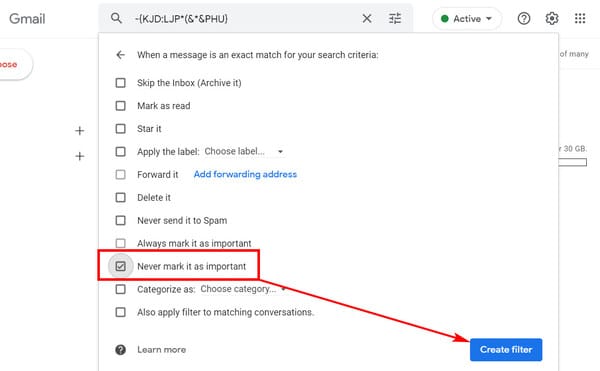
3. tick “Never mark Important”.
4. As you create the filter, make sure to select to have it applied to all matching messages. For Outlook users, that will also empty your Important folder and as it will remain empty as long as the filter is active, and then you can just ignore that folder.
1. 
2. 
3. 
Note it appears that “-gobbldygook then don’t make it important” rule must be the first rule in the rule-list. Otherwise, emails that meet a rule criterion may be marked important prior to the “don’t make it important” rule.
I can’t thank you enough for this post! Your are AMAZING … FINALLY the important markers are off.
I greatly appreciate you sharing this info.
Doin’ a happy dance with you! :)
Karen Shanley, I don’t know you but if fix no 2 for important labels works, you are an angel :) I truly despise the important labeling.
You and me both! :)
thank you!@!
Do you have a similar workaround for Updates in Gmail? I have unchecked the category in settings, but items are still going there. Also, we have thousands of emails in Updates folder but I don’t want to delete them because then it deletes them everywhere.
Yes, to stop Gmail from marking emails as Updates and prevent them from being automatically moved to the Updates category, you can create a similar filter to the one you use for the Important markers. Here’s a step-by-step guide:
To see the full post with image instructions go here: >How Stop Gmail From Marking Emails as Updates – Set Up This Filter
How to Set Up a Filter to Stop Emails from Being Marked as Updates
Open Gmail and Go to Settings:
Click on the gear icon in the top right corner.
Select “See all settings.”
Navigate to Filters and Blocked Addresses:
Click on the “Filters and Blocked Addresses” tab.
Scroll down and click on “Create a new filter.”
Set Up the Filter Criteria:
Leave ALL fields empty.
Apply the Filter Settings:
Click on “Create filter.”
In the next screen, check the box for “Categorize as” and select “Primary” from the dropdown menu.
Optionally, check “Apply the label” and select a label you want to apply to these emails for easier organization.
Check the box “Also apply filter to matching conversations” to apply the filter to existing emails.
Finalize the Filter:
Click “Create filter” to save it.
This filter will effectively prevent new emails from being categorized as Updates by ensuring they are always placed in the Primary tab.
Handling Existing Emails in the Updates Folder
For existing emails in the Updates folder that you don’t want to delete, you can move them to another folder without deleting them:
Select All Emails in the Updates Folder:
Go to the Updates tab in Gmail.
Check the box at the top to select all emails on the current page.
Click on “Select all conversations in Updates” to select all emails in the Updates folder.
Move Emails to Another Folder:
Click on the “Move to” icon (a folder with an arrow) and select “Inbox” or any other folder/label you want to move them to.
This will ensure your emails are moved out of the Updates category without being deleted.
By following these steps, you can stop Gmail from automatically categorizing emails as Updates and manage your existing emails more effectively.
THANK YOU!
These gmail features are infuriating.
Thanks for letting me know it helped you.
Hello! I’m also in search of an answer to this problem. Before I try #2, do you know if it just removes them from the IMPORTANT folder, or does it delete the messages?
Thank you!
Hi Joni,
#2 only removes the important labels. It does not delete the messages. :)
Good news thankyou. I’ve followed the above fix . How do I apply the new filter to all of the messages already in the Important folder?
Did you try the 2nd fix? That should get rid of the Important tag everywhere.
Tried no.1 a number of times but to no avail.
I didn’t think of doing no.2, excellent workaround – thank you Karen :)
Glad it helped!
I had already done the things to Disable Gmaill Important markers, and it was working on my browser email. But not on my phone’s Gmail app. I’ve set up sever filters but I didn’t understand how what you suggested would do anything. I was pleasantly surprised when i set it up on my Chrome Gmail account and ran it (which didn’t have any in its Important folder), that on my phone’s Gmail app, all the items in the Important folder just disappeared. Wonderful. Thanks so much!
Glad it solved the problem. Can’t believe Google would set it up this way and not make it easier to turn it off.
Thanks for the advice on to Disable and Remove Important Labels in Gmail. It worked like a charm.
Great! Glad to hear it.
I was excited, it sounds like a great idea…but still doesn’t stop marking messages for me SMFH
Hi Justin,
Do you have multiple gmail accounts? If you do, you have to sign into each account online (not through the desktop app) and make the change on each account.
What an easy solution!
Hopefully this will give me relief from the “Important” folder
So simple: every email that does NOT have a string of random letter/numbers will not be marked as “Important”
Thank you so much.
Sometimes Google is too clever by half. :)
Glad that helped.